Taking Attendance
Goal: Mark student attendance for a class session, understand the tardy and absence rules, and handle make-up sessions.
Taking attendance is the most common daily action in VoTech. The system tracks every status, enforces absence limits, and automatically converts tardies into absences.
📋 The Attendance Page
Click Attendance in the sidebar under Program to open the attendance hub. The page has two sections:
- Active Classes — cards for each active class at your location with a Take Attendance button
- Recent Records — a searchable log of all attendance records with date, student, class, session, and status
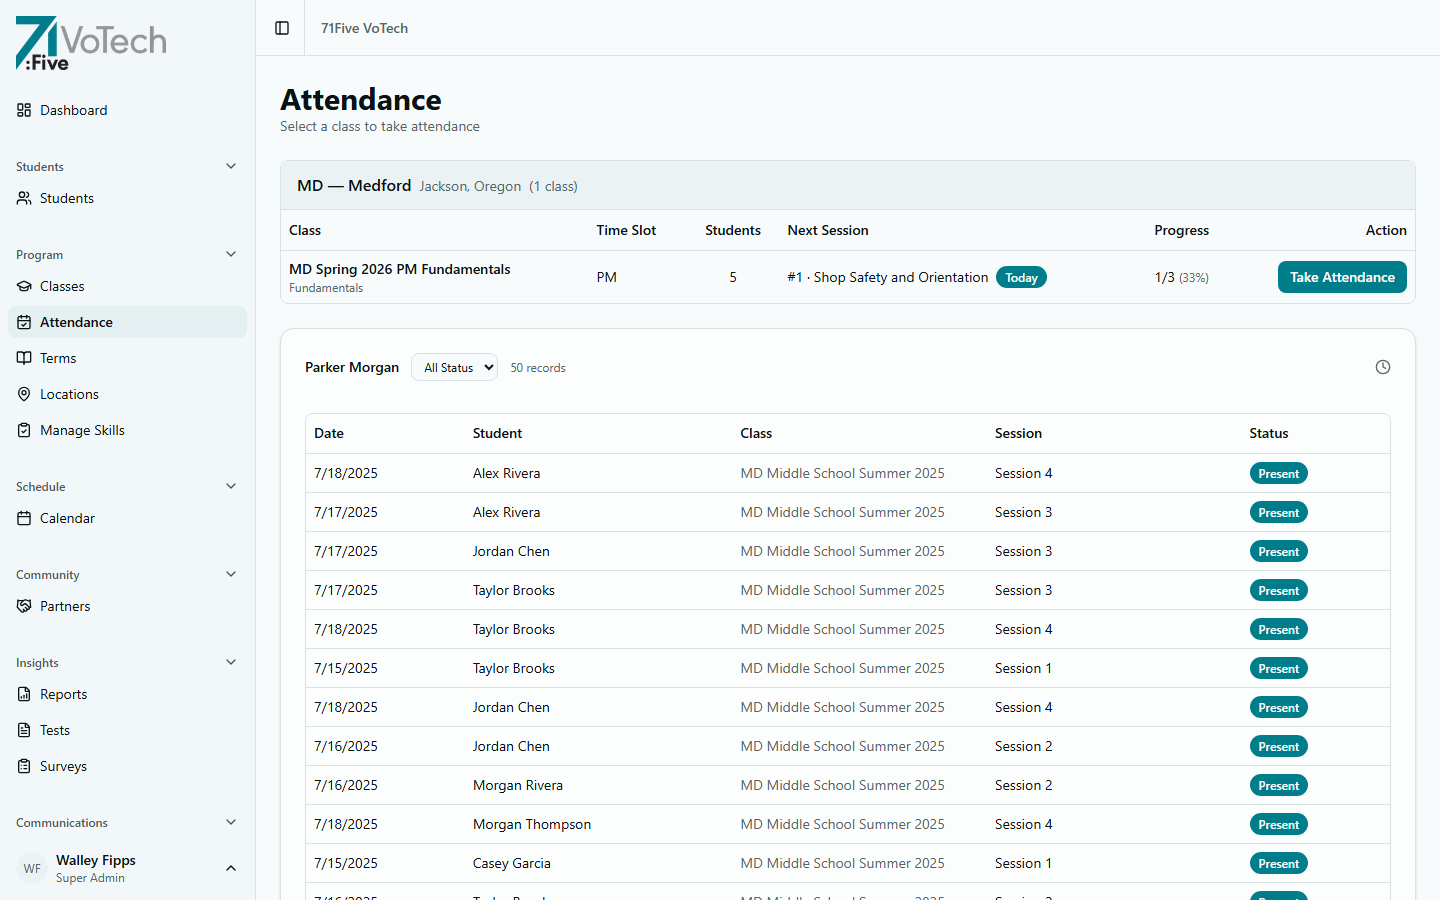
The Recent Records table shows every attendance entry. Use the status filter dropdown to show only Present, Absent, Tardy, or other statuses.
You'll only see classes at your location. Directors see their county; Super Admins see all locations.
Taking Attendance for a Session
When active classes exist at your location:
- Find your class in the Active Classes section at the top
- Click Take Attendance on the class card
- The attendance form opens showing the student roster for the next scheduled session
- Click each student's status button to mark them (see Marking Students below)
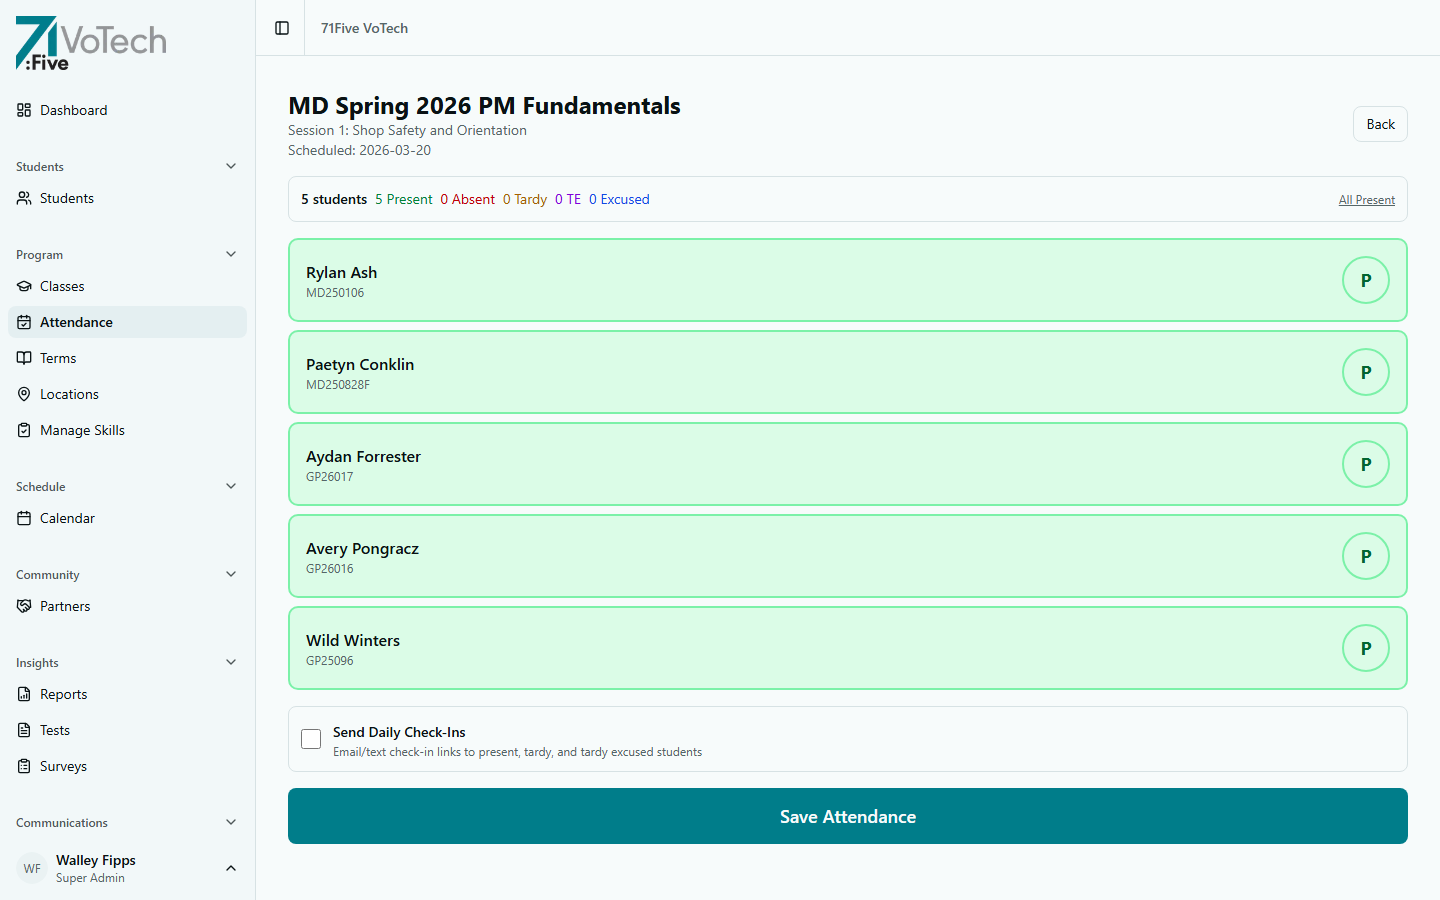
The form shows the class name, session title, scheduled date, and a summary bar with counts for each status. Each student row displays their name, student ID, and a circular status button you can click to cycle through statuses.
If you don't see a class in the Active Classes section, the class may be completed or not yet activated. Contact your Director or Super Admin to check class status.
✅ Marking Students
For each student in the roster, click the status button to cycle through options. Each status has a distinct color badge so you can see the class at a glance:
| Status | Color | What It Means | Counts As |
|---|---|---|---|
| Present | Green | Student attended the session | No impact |
| Absent | Red | Student did not attend, no excuse | +1 absence |
| Absent Excused | Blue | Student didn't attend, valid excuse provided | No impact on absence count |
| Tardy | Yellow | Student arrived late, no excuse | Tracked — 2 = 1 absence |
| Tardy Excused | Purple | Student arrived late, valid excuse | No impact |
- 1
Find the student
Locate the student's name in the roster list. Students are listed alphabetically.
- 2
Click the status button
Click the student's current status badge to cycle to the next status (Present → Absent → Tardy → etc.). The badge updates immediately but is NOT saved yet — you must click Save Attendance when done.
💡 On mobile, the status buttons are extra large for easy tapping. The Save Attendance button is sticky at the bottom of the screen. - 3
Save your work
When all students are marked, click the Save Attendance button (sticky at the bottom on mobile, bottom of the form on desktop). Attendance is NOT saved until you click this button — navigating away will lose all marks.
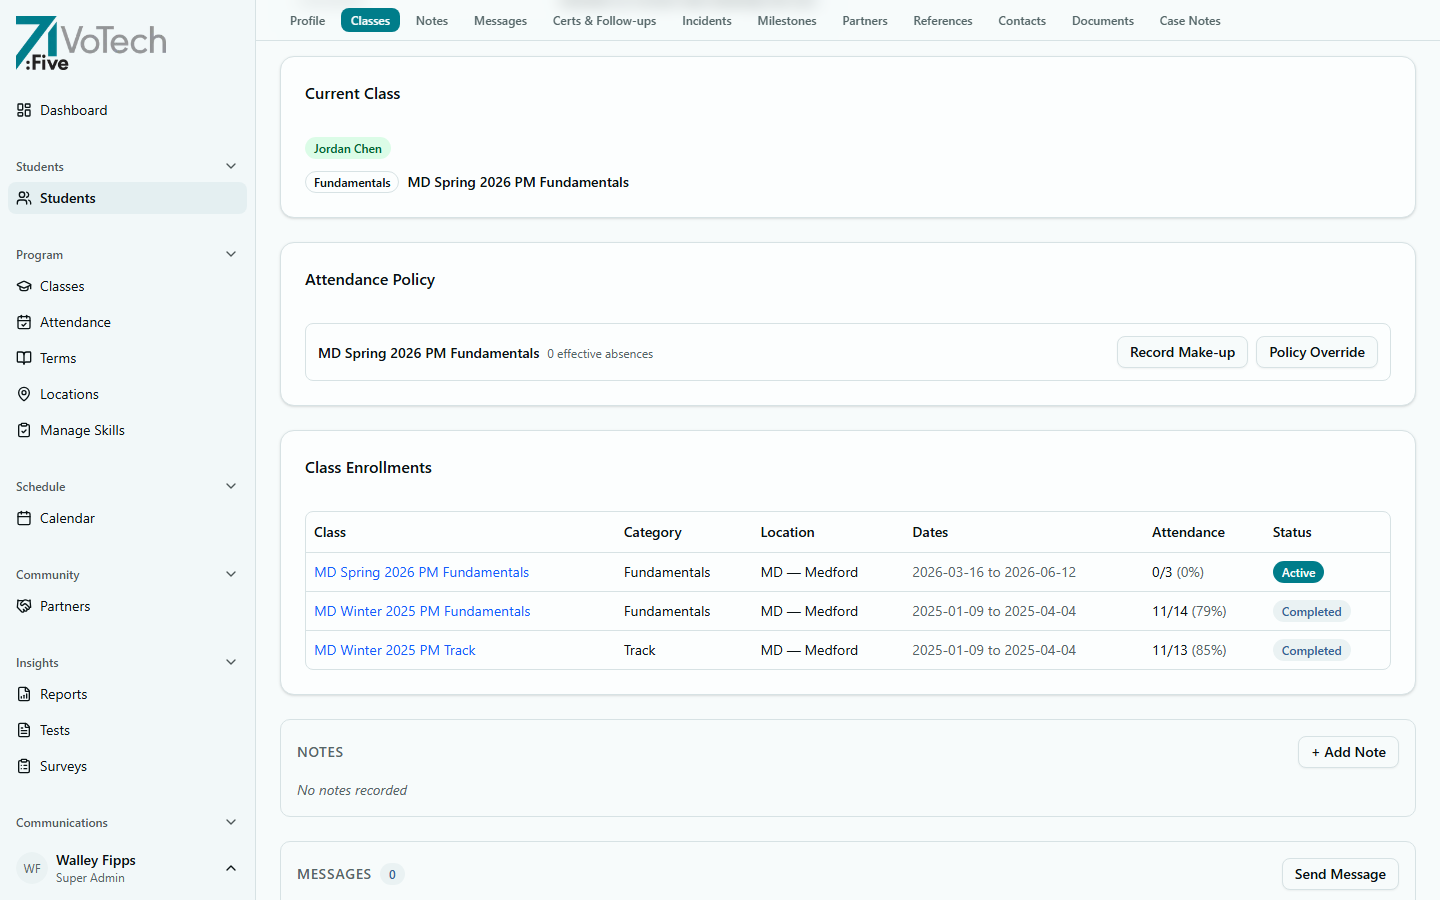
Viewing Attendance Per Student
Each student's attendance summary appears on their detail page under the Classes section, showing attendance counts and percentages per class.
⚠️ The 2-Tardy Rule
VoTech automatically tracks this policy:
Every 2 unexcused tardies count as 1 absence.
This is computed automatically — you don't need to do anything. When a student accumulates 2 unexcused tardies, the system adds 1 to their absence count. You'll see this reflected in the student's attendance summary on their detail page.
Excused tardies do NOT count toward the 2-tardy rule. Only unexcused (plain "Tardy") marks are counted.
🚨 Absence Limit Alerts
VoTech enforces a maximum 2 absences per cohort (class term). The system alerts you when a student is approaching or at the limit:
| Alert Level | Meaning | What to Do |
|---|---|---|
| Needs Make-Up | 1 absence — the student must complete 1 make-up session | Schedule a make-up session |
| At Limit | 2 absences — the student is at the maximum | One more and they must roll over |
| Must Rollover | 3+ absences — the student exceeds the limit | Student may need to be moved to the next cohort |
These alerts appear:
- On the attendance screen, next to the student's name
- On the student's detail page, in the attendance summary
- On the Dashboard's My View tab (for Case Managers)
📨 Send Daily Check-Ins
The attendance form includes an opt-in "Send Daily Check-Ins" checkbox (default: OFF). When checked and you click Save Attendance, VoTech generates and delivers check-in links to each student marked present. See Daily Check-Ins for details.
👥 Makeup Guests
Students from other cohorts can attend a session as a makeup guest. They appear in the roster with a "Makeup" badge. Non-volunteer roles can click "Add Makeup Guest" to search for and add a student from another class.
📅 Session Date Editor
A SessionDateEditor component on the attendance page allows changing the session date directly — useful when a session is rescheduled. Click the pencil icon next to the date to edit.
🔄 Recording a Make-Up Session
When a student completes a make-up session to offset an absence:
- 1
Open the student's detail page
Go to the Student Roster and click the student's name, or navigate from the attendance page.
- 2
Find the Classes section
Scroll to the Classes section or click Classes in the sticky tab bar. Find the class with the absence.
- 3
Add the make-up session
Click Add Make-Up Session. Enter the date and notes about what the student did, then click Save.
💡 The system deducts 1 from the student's absence count after a make-up is recorded.
🛡️ Policy Overrides
Sometimes the standard rules don't apply. VoTech supports policy overrides for special circumstances:
- Medical — extended illness, hospitalization
- Family emergency — death in family, housing crisis
- Other — court dates, required appointments
To apply a policy override:
- Go to the student's detail page
- Scroll to the Classes section
- Click Policy Override
- Select the reason and enter notes
- Click Save
Policy overrides are tracked in the audit trail. Use them only for legitimate exceptions — they affect grant reporting numbers.
✏️ Correcting Old Records
VoTech allows attendance corrections within a 72-hour window:
- Case Managers, Directors, Coordinators, and Asst. Coordinators can edit attendance records up to 72 hours after the session
- Volunteers can correct their own records within 72 hours
- Super Admins can edit any attendance record at any time (requires
override72hrflag and second confirmation) - After 72 hours, only a Super Admin can make changes
To correct a record:
- Navigate to the attendance session (by date and class)
- Find the student whose status needs to change
- Click the current status to change it
- The old status and new status are both logged in the audit trail
All attendance corrections are logged. The system records who made the change, when, what the old status was, and what the new status is.
💡 Tips & Common Mistakes
Mark attendance at the start of each session while students are arriving. You can always change a "Present" to "Tardy" if someone shows up late.
If a student's absence count looks wrong, check whether the 2-tardy rule has converted tardies into an absence. See the Attendance Rules Reference for the full calculation.
Related Guides
- Daily Check-Ins — check-ins triggered after attendance
- Attendance Rules Reference — detailed rules and calculations
- Student Detail Page — view a student's attendance summary