Enrolling a New Student
Goal: Walk through the 6-step enrollment wizard to add a new student to VoTech.
Before you begin: You need the student's basic information — name, date of birth, contact info, and education background. Have the intake paperwork ready.
🚀 Starting the Enrollment Wizard
- 1
Navigate to the Students page
Click Students in the sidebar. On the student roster page, click the Enroll Student button to open the enrollment wizard.
- 2
Follow the progress bar
A progress bar at the top shows which step you're on (e.g., 'Step 1 of 6: Basic Info'). Use the Back and Next buttons at the bottom to navigate between steps.
💡 Required fields are marked with an asterisk (*). The Next button will be disabled if required fields are incomplete.
📝 The 6 Steps
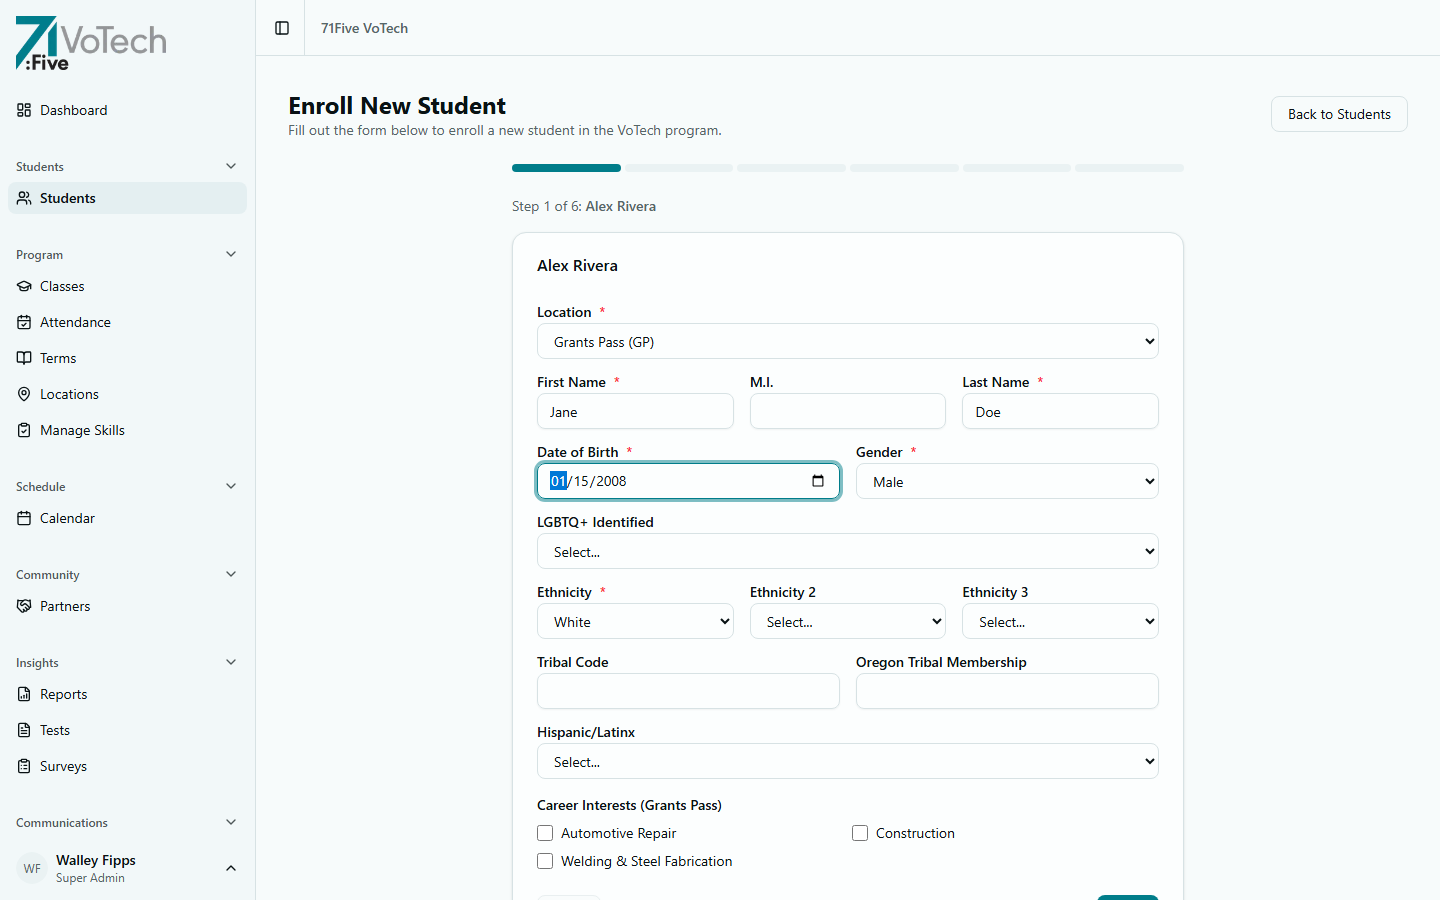
Step 1: Basic Info
Enter the student's core identity: Location (required), first/last name, preferred name / nickname (optional — displayed as First "Nickname" Last throughout the app), date of birth, gender, ethnicity (up to 3), tribal affiliation, Hispanic/Latinx, LGBTQ+ identification, program type, and career path. Career paths are database-driven per location — if the dropdown is empty, the admin hasn't configured paths for that location yet (see Admin → Career Paths).
Once you've filled in the required fields, the form looks like this:
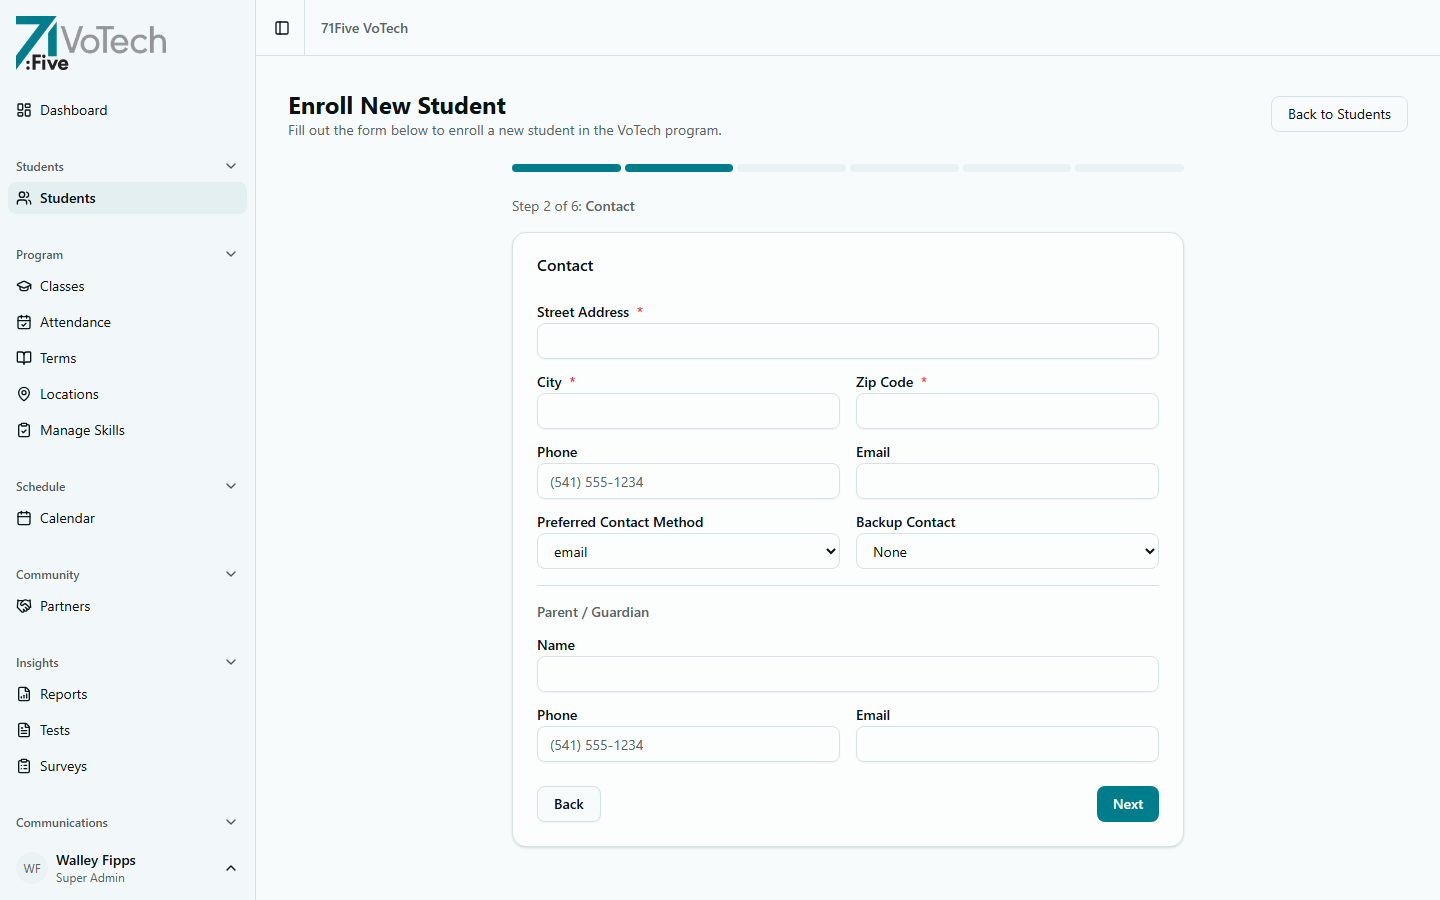
Step 2: Contact Information
Enter street address, city, zip code, phone number, email address, preferred contact method, backup contact method, SMS consent checkbox (with TCPA disclosure text), and parent/guardian info.
If the student is experiencing homelessness, check the "Student is homeless" checkbox to bypass address validation. The address fields become optional.
Phone numbers are automatically formatted and zip codes are validated (5-digit or ZIP+4 like 97501-1234).
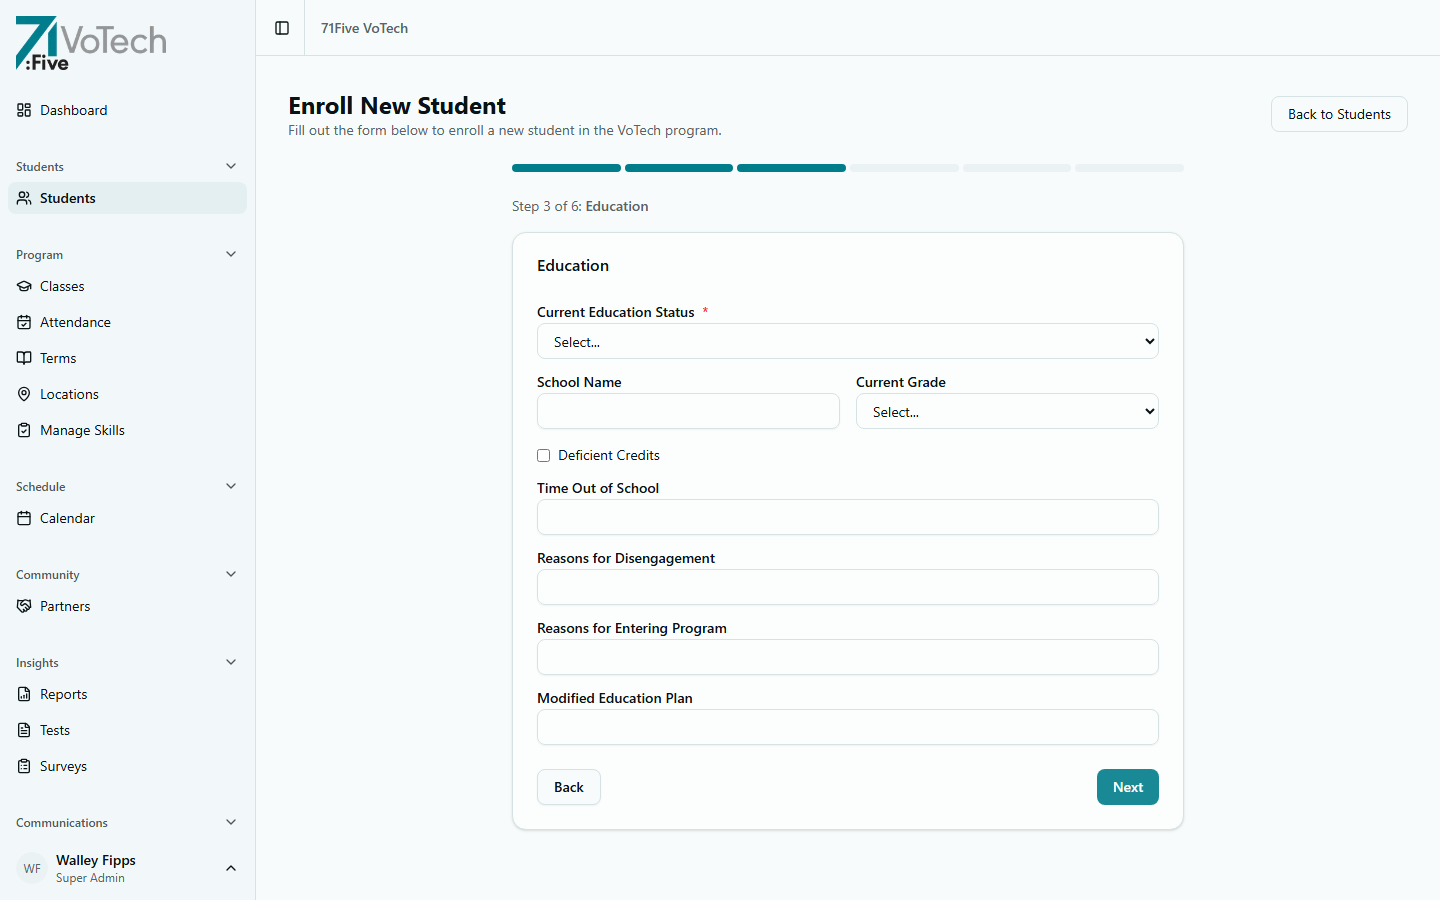
Step 3: Education
Enter education status (enrolled, graduated, GED, dropped out, etc.), school name, grade level, deficient credits, time out of school, and reasons for disengagement/entering program.
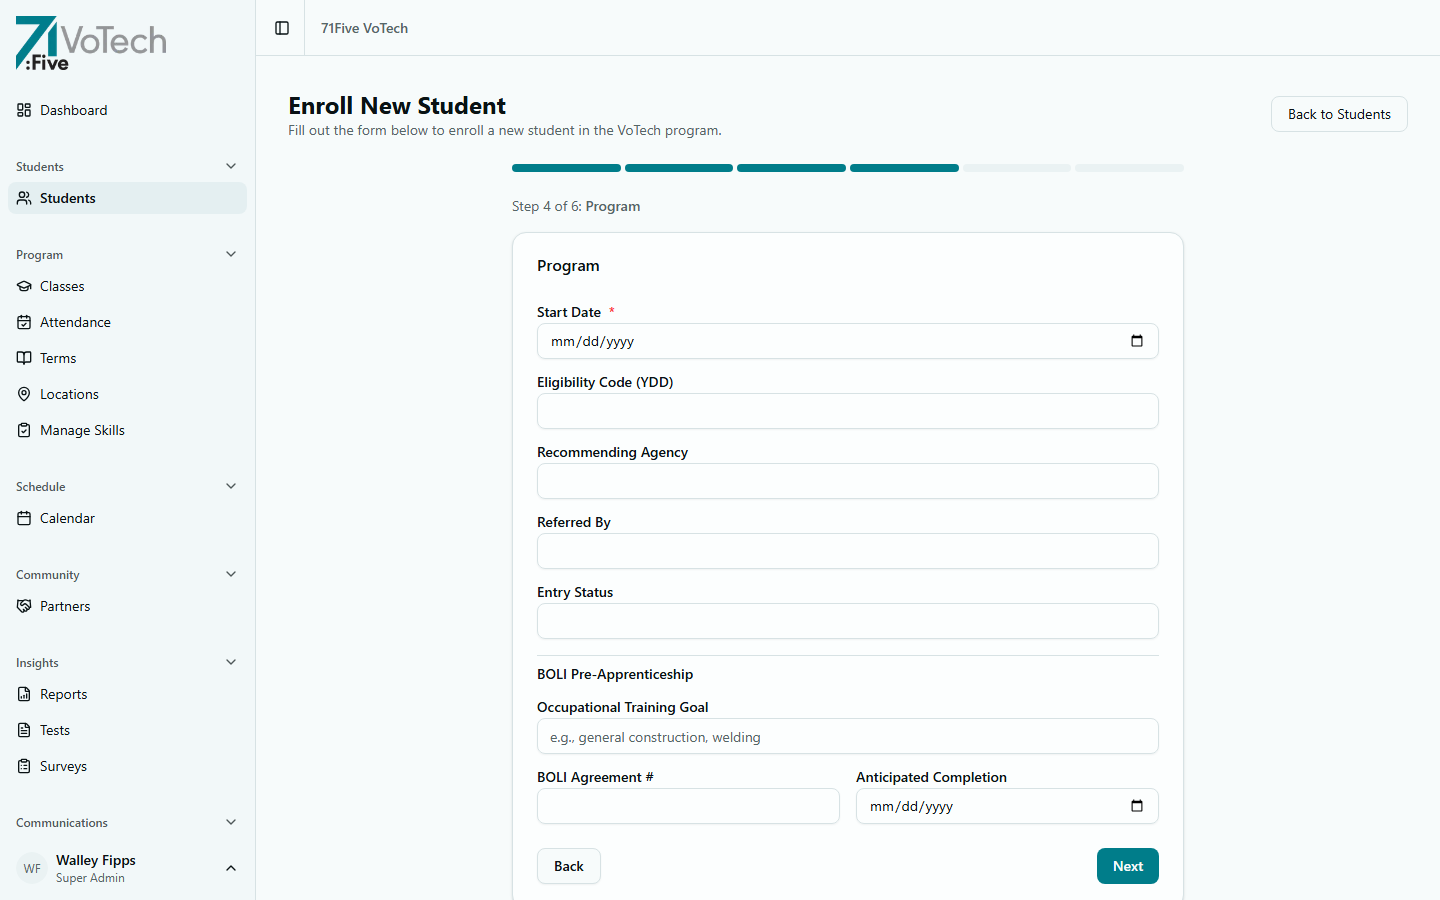
Step 4: Program
Set the start date (defaults to today), eligibility code (YDD), recommending agency, referred by, and entry status. The BOLI Pre-Apprenticeship section covers occupational training goal, BOLI agreement number, and anticipated completion date.
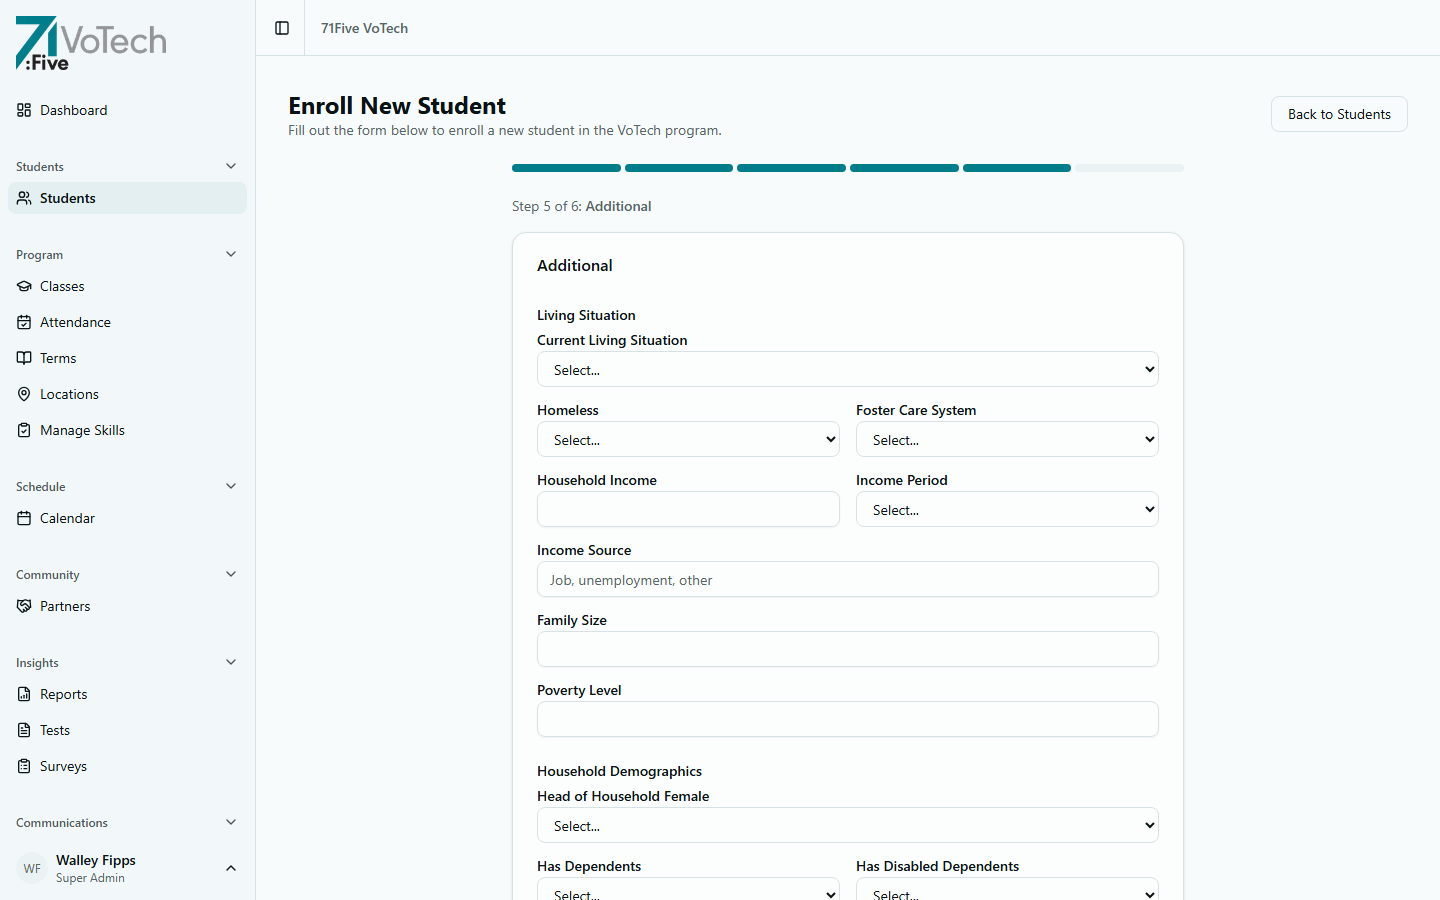
Step 5: Additional Info
The largest step — covers living situation, household demographics, health & justice, benefits (SNAP/TANIF), identification (SSN — encrypted on save), ACE data, employment, grant & program flags, and spiritual milestones.
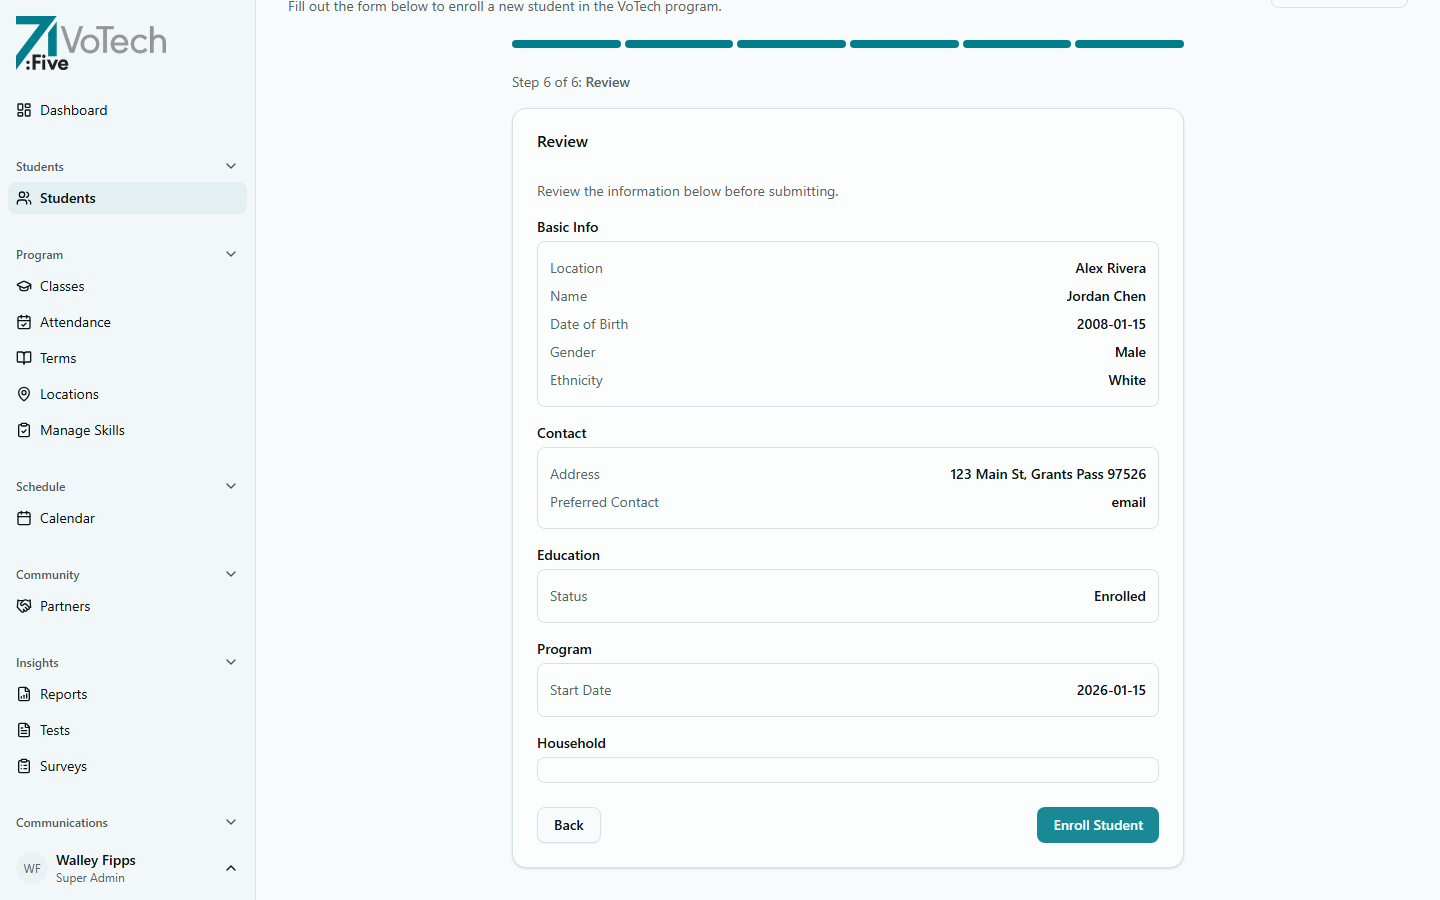
Step 6: Review & Submit
Review all entered information organized into 5 summary sections: Basic Info, Contact, Education, Program, and Household. SSN shows as "provided (will be encrypted on save)". An optional class selector lets you assign the student to a class immediately. Use the Back button to return to any step and make corrections, then click Enroll Student to create the record, or click Save & Exit to save as a draft and resume later.
Draft enrollments are visible on the roster as "N Pending Enrollments" and can be resumed from where you left off. Use this when you're missing information and need to continue later.
Step 5 contains sensitive data across multiple tiers. Living situation is Tier 3, ACE data is Tier 2, and SSN is Tier 1. Handle with care — this information is used for grant reporting and support services.
Grant flags affect which reports this student appears in. Ask your Director if you're unsure which flags to set.
🔍 Duplicate Detection
After completing Step 1 (Basic Info), VoTech automatically checks for existing students with similar names using fuzzy matching. If potential duplicates are found, a warning panel appears showing:
- Likely match (≥70% similarity) — strong match, review carefully
- Possible match (≥50% similarity) — moderate match, worth checking
- Weak match — low similarity, probably not a duplicate
If the student is genuinely new, click "Not a Duplicate — Continue" to proceed. If the student already exists, cancel enrollment and navigate to their existing record instead.
The duplicate check prevents creating multiple records for the same student. Always review the matches before continuing — merging duplicates later is much harder than preventing them.
🆔 Student ID Format
VoTech automatically generates a Student ID when you submit enrollment:
| Location | Format | Example |
|---|---|---|
| Medford | MD + 2-digit year + 2-digit month + 2-digit sequence | MD260201 |
| Grants Pass | GP + 2-digit year + 3-digit sequence | GP26001 |
| Shady Cove | SC + 2-digit year + 3-digit sequence | SC26001 |
You don't need to enter this — it's created automatically.
✅ What Happens After Enrollment
When you submit the enrollment:
- The student record is created and appears in the Student Roster
- Staff at the student's location receive an in-app bell notification and email about the new enrollment
- You're redirected to the new student's Detail Page
💡 Tips & Common Mistakes
You don't need to fill in every field to complete enrollment. Required fields are marked with an asterisk (*). You can always add more information later on the student's detail page.
Double-check the location assignment in Step 1. If a student is assigned to the wrong location, they'll only be visible to staff at that location and won't appear in the correct roster.
If a student was previously enrolled and left the program, search the roster with Status = "Inactive" first. You may be able to reactivate them instead of creating a duplicate record.